
Applocker Walkthrough
Includes Remote Event Viewing and Event Forwarding Setup


Applocker is highly effective at controlling what software can be run in your environment.
It can be used to block malware.
It can be used to block games and other off task software.
It can be used to block applications with restrictive licensing.
Setting up Applocker is fairly easy. Your intent should be considered first. Are you just stopping malware? Are you stopping time wasting apps? Are you guarding yourself from predatory software vendors? Is it all three? That should guide what you allow.
Next decide if an audit is needed. In Audit Mode nothing is blocked, but your Event Logs will record what would have been blocked. In Block Mode, anything not added to your allowed list is blocked.
For a small organization, you can likely skip auditing and go right to blocking. For a medium to large organization, you’ll want to audit. I’ll cover both.
I’m starting with a small organization (not Auditing) because it is easier to understand the walkthrough if you see immediate results and definitive feedback.
Everything will be done in Group Policy where possible. You will not need to visit every workstation. You will need to visit just one!
This walkthrough is not the end-all-be-all of Applocker. It covers Executables in a way that is meant to get someone started without overwhelming them with options. Once you have Executables covered, you can consider applying it to Windows Installers, Scripts, and Packaged Apps as well.
Small Organization
In a small organization you’ll want to advise everyone that you are implementing Application Control. Let them know that some programs will stop working, and that most can be added to the allowed list, once you know about them.
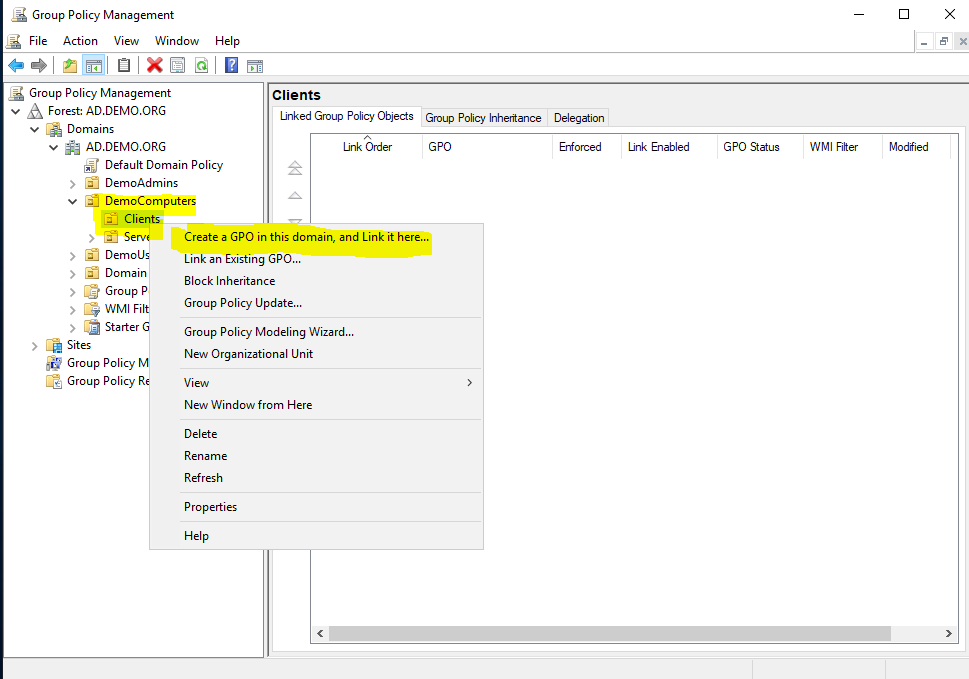
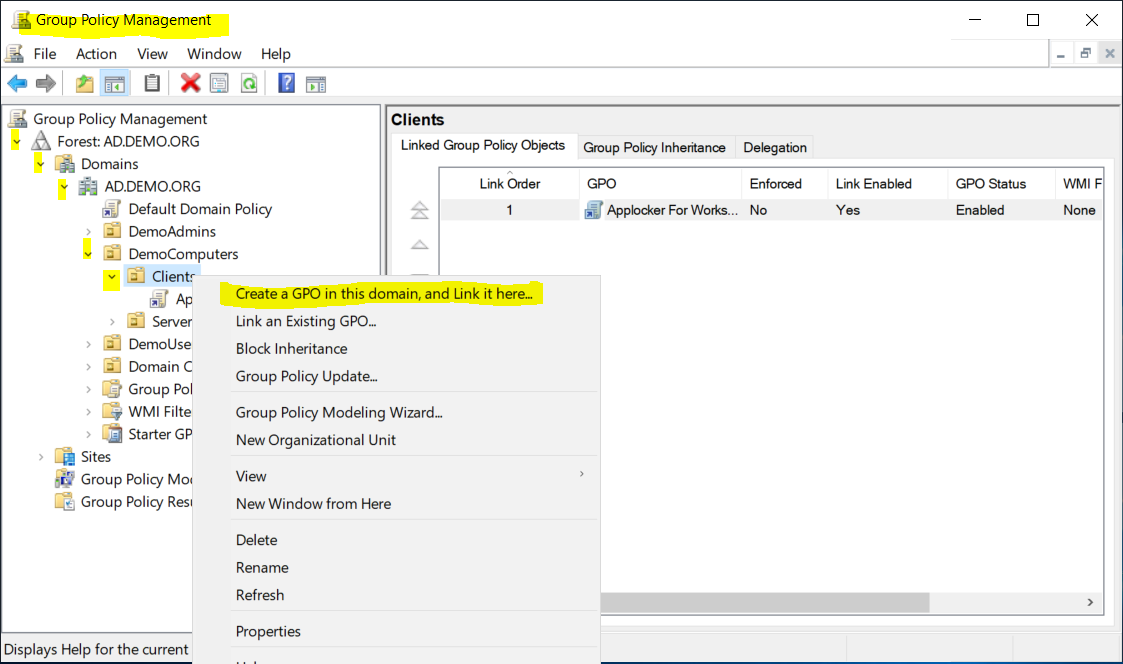
Let’s dive in! Open Group Policy Management. Find the OU where your client machines live.
Tip: If you’re nervous about this, create a Sub OU instead. Then put a test workstation in the Sub OU. Only that workstation will be impacted.
Create a new policy.
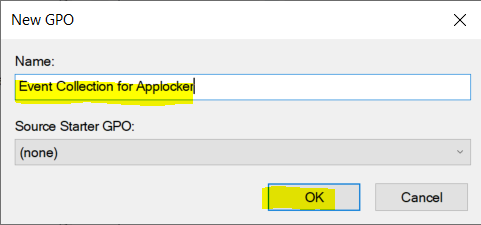
Name it

Right-click and choose edit

Expand your way down to Applocker/Executable Rules. Right-click and choose Create Default Rules.

At this point, create default rules for Windows Installers, Script Rules & Packaged app Rules too. Otherwise, Windows features will not work.
You’ll now see this for Executable Rules:

The default executable rules will allow anything to run that is:
In the Windows folder or subfolders.
In the Program Files folder or subfolders.
Launched by an Administrator (Local Administrator included).
The default executable rules are designed for places where:
You trust what is already installed.
Your users are not Local Administrators.
You’re in a hurry to get this going.
Best practices say the first thing you should add is a Deny entry for “C:\Windows\Temp” folder. Users may have write access in certain scenarios.


It looks like this now:

If you don’t trust what is already installed in your environment, delete the entry for Program Files (and be prepared to approve any items in that folder).
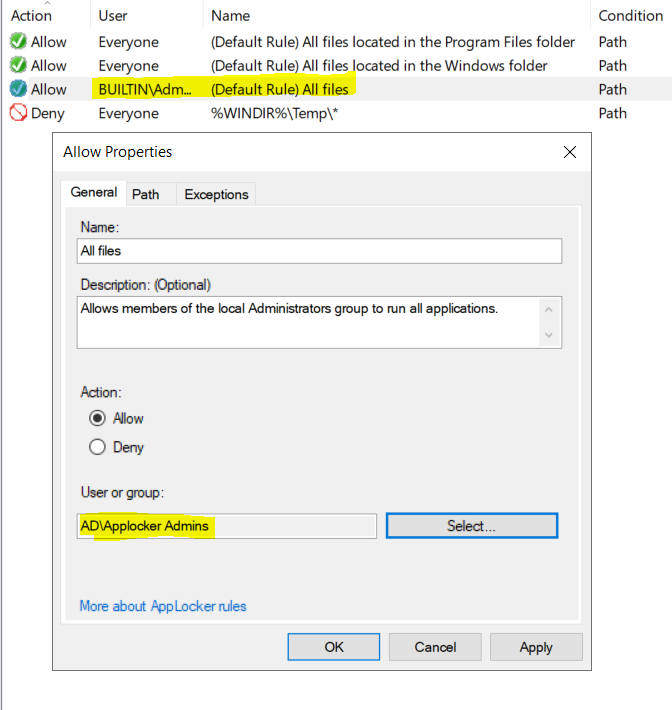
If your users are Local Admins, create a new security group for Applocker Admins. Add yourself to the group. Then edit the ‘All Files’ rule to only allow Applocker Admins to run All Files.
My personal advice is to go with the ‘Applocker Admins’ group, and not shortcut it by using a built-in group like the Domain Admin’s group. Domain Admin’s that can install anything anywhere are your biggest risk.
OPTIONAL
Add a network folder for preapproved installers. This allows some users to self-install approved apps. (Standard Users will still be subject to elevation prompts. Some self-installed apps may still require further approval once installed.) I like it because it also becomes a todo list for what I need to approve.
Use Enterprise versions when available. Enterprise versions will try to install to the Program Files folder, home user versions will often install to the AppData folder.


It looks like this now (unless you removed Program Files):

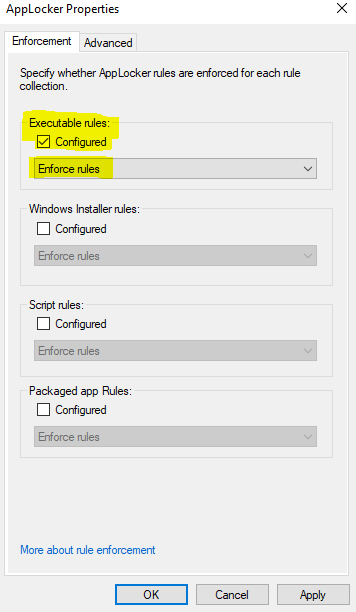
At this point, you can change the Executable Rules mode to Configured and Enforce Rules. Before you do, skip to the bottom of this guide and read about Audit Mode if you are at all uncertain about potential impact on end users.


Try it out.
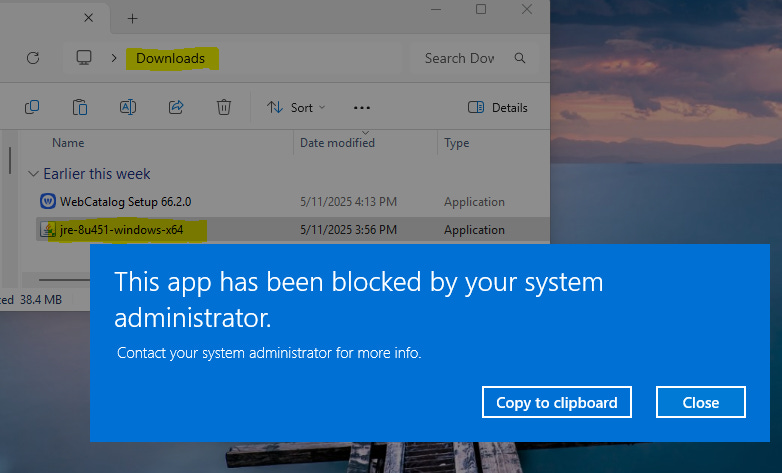
After two reboots, your clients should have the new policy. On a client machine, launch something unapproved but safe.

You should see this:

Seeing What Is Blocked
The Event Viewer on the end user’s machine shows you what is blocked:

The Details tab will give you more info:

In the above example, you need to add either a Path Rule with the FilePath, or Publisher with the Fqbn .
Optional, but highly desired.
Going to the end user’s machines to look at logs is no way to live. You’ll look like a rookie. Let’s modify this same GPO to allow you to remotely see the logs on an end user’s machine.

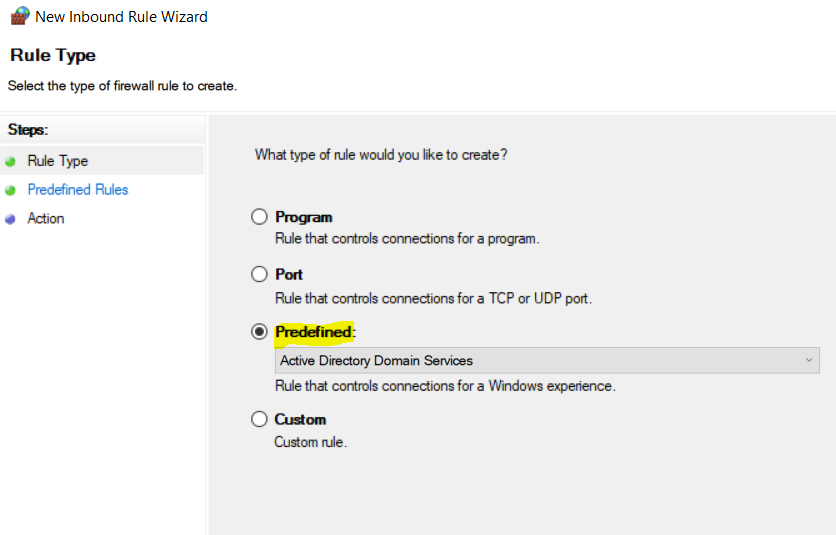
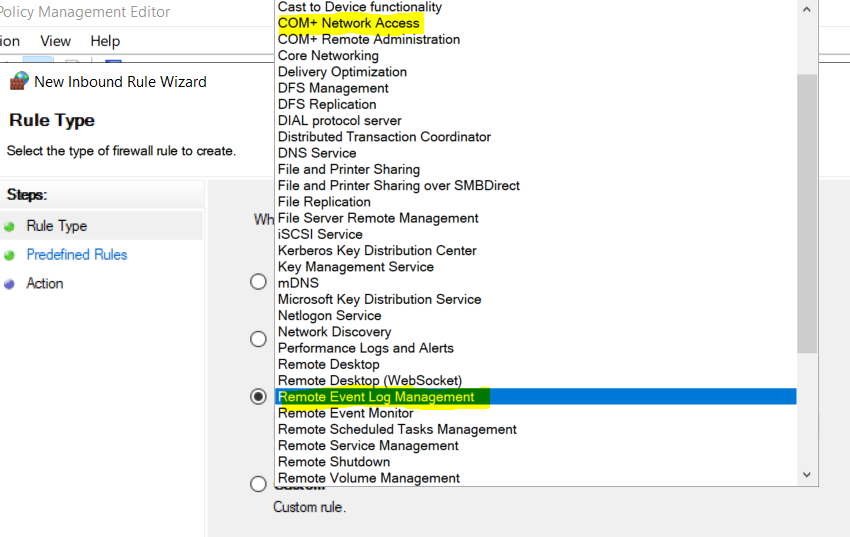
Select each individually (COM+ Network Access and Remote Event Log Management) and use the default options as you go. This is the result:

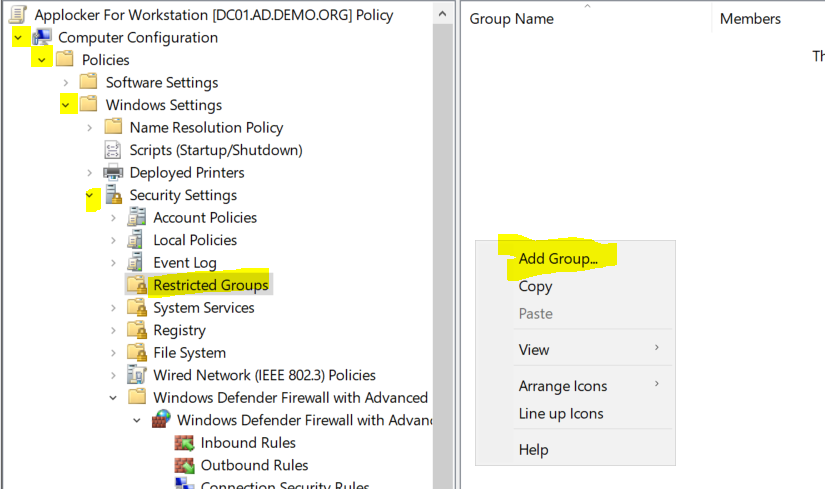
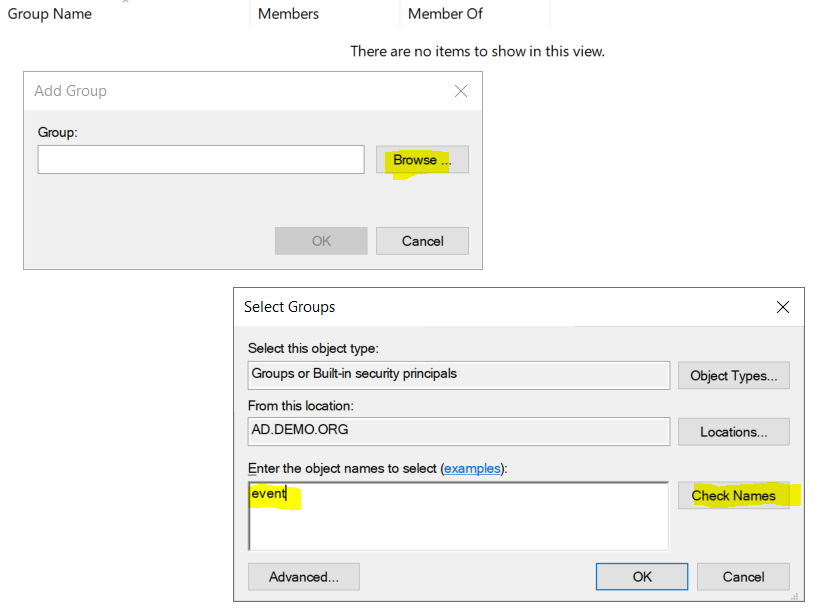
Now add yourself to all of the local machines Event Log Viewers groups as shown:


The end result is this:

Reboot your clients so they get the policy.
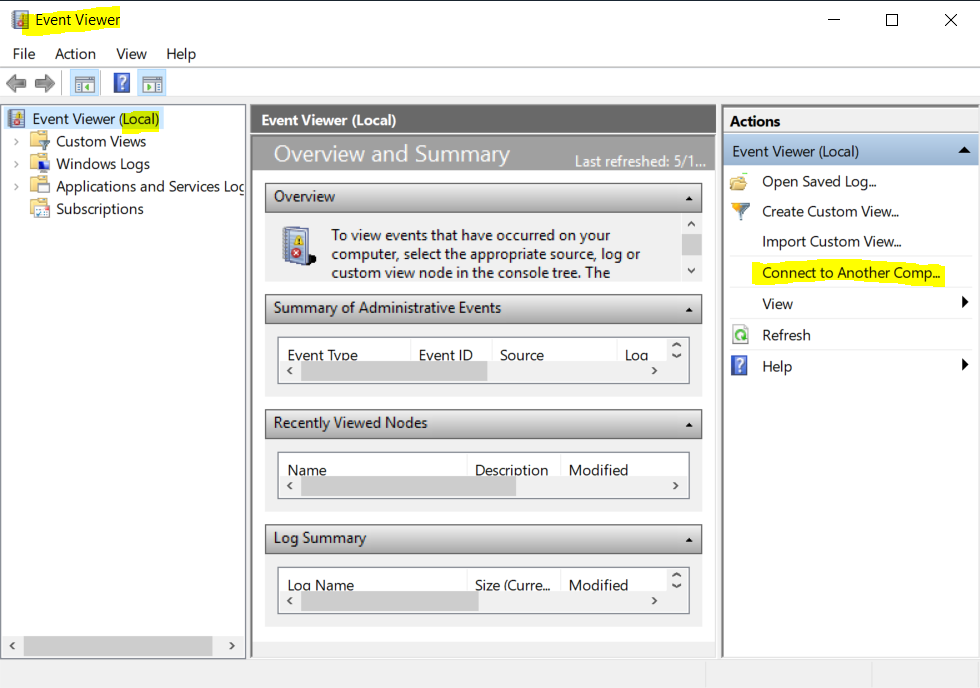
Now try it out. On your own machine, logged in as a user who is a member of the ‘Applocker Admins’ group, open Event Viewer. Choose Connect to Another Computer.
Enter the name of an end user computer (must be powered on).

Now you can remotely examine the Applocker Logs!

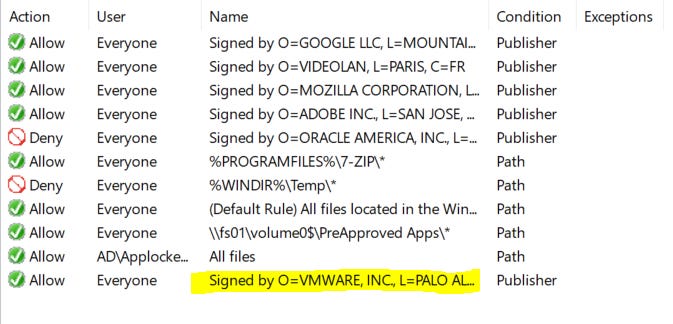
In the above, you can see that VMWare Tools needs to be approved.
Approving Apps
Now you can begin adding allowed items. If you did the optional preapproved installers folder, start there. The installers are approved, but not the installed app!
Apps can be approved or denied for ‘everyone’ or for computer groups.
There are three ways of approving apps.

Publisher is the most secure. The app must be digitally signed.
Path is less secure, more so when wildcards are used.
File Hash is a major pain. If your app never gets updated, and doesn’t have a standard path, this may be the way to go.
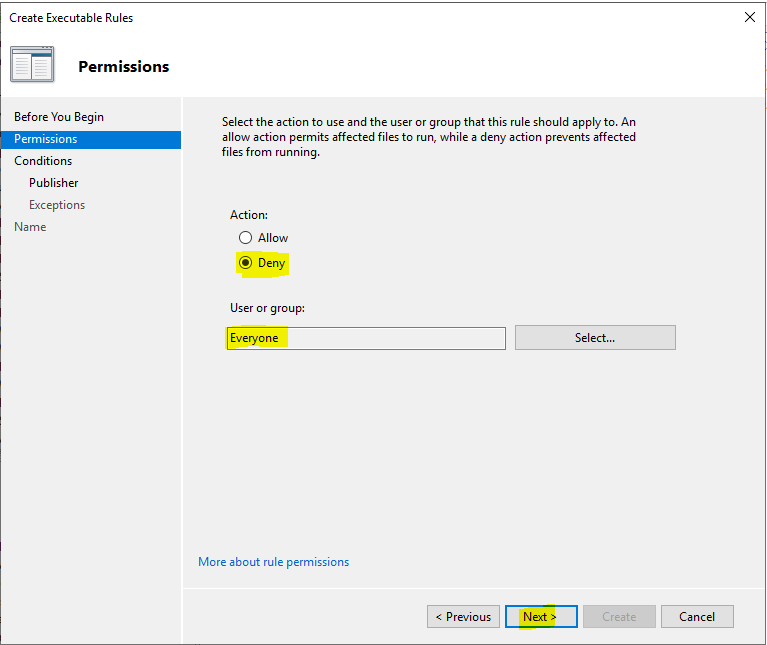
Publisher Example:

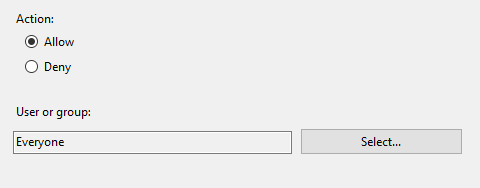
Choose Everyone and allow:

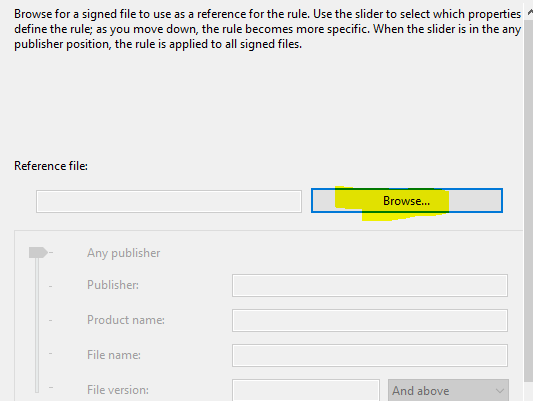
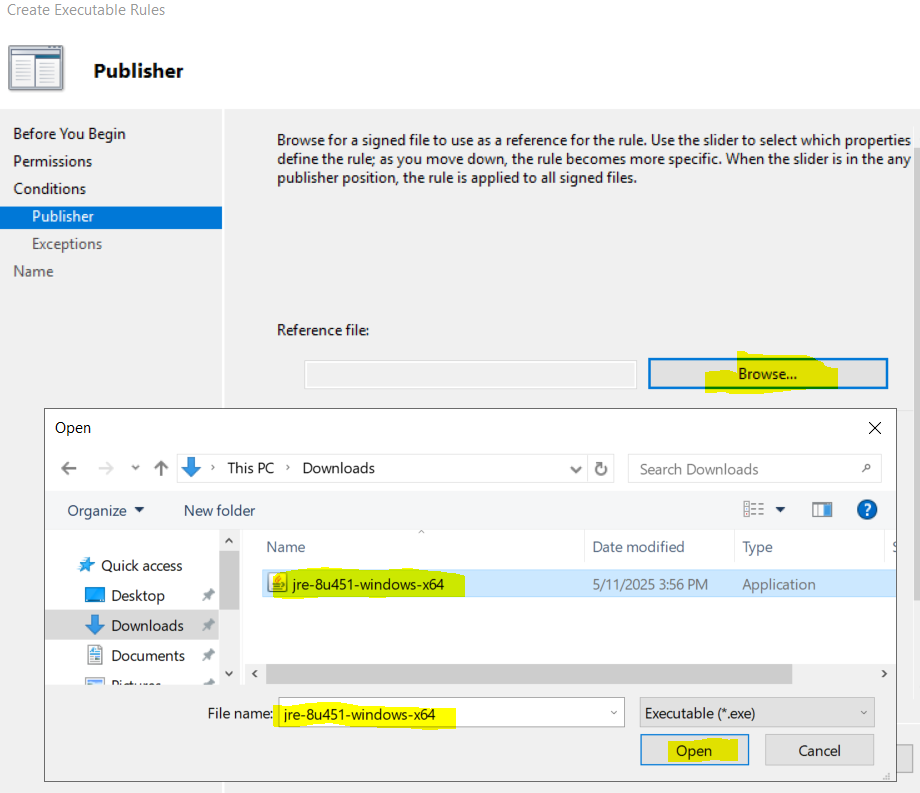
Choose Publisher:

Browse to the exe file to allow:
Here we’re choosing Chrome:

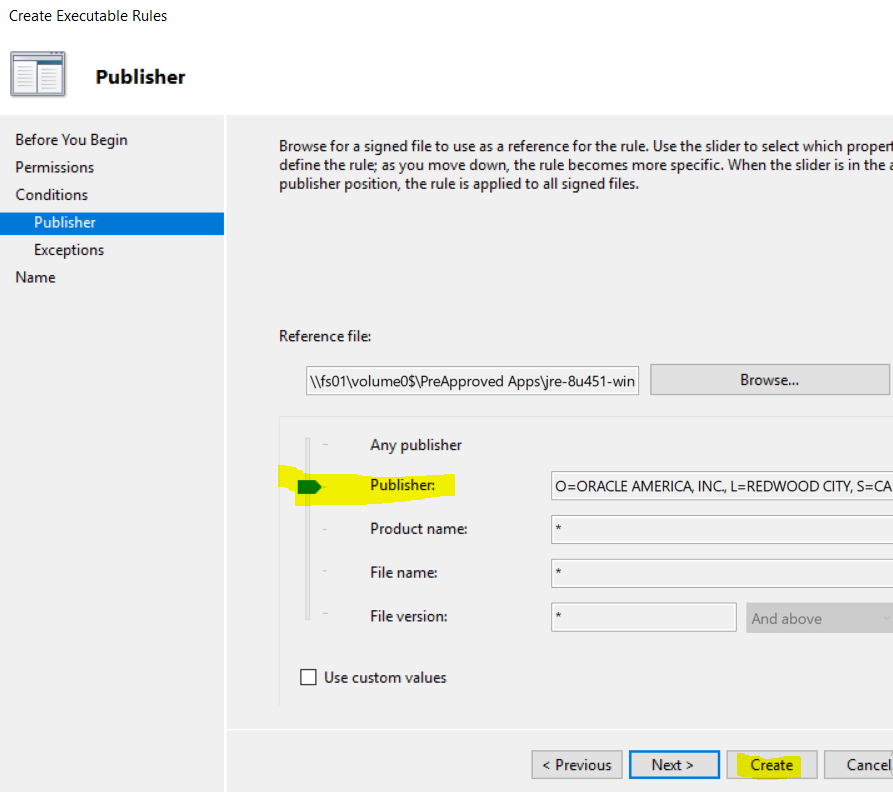
If we accept it as is, only very specific permissions are created. You will nearly always want to broaden this to just Publisher.

I’m going to approve anything from Google by moving that slider up to Publisher.

Now all Google signed products are allowed. The asterisks are wildcards. Just click the ‘Create’ button to finish. Below is the addition to the allow list:

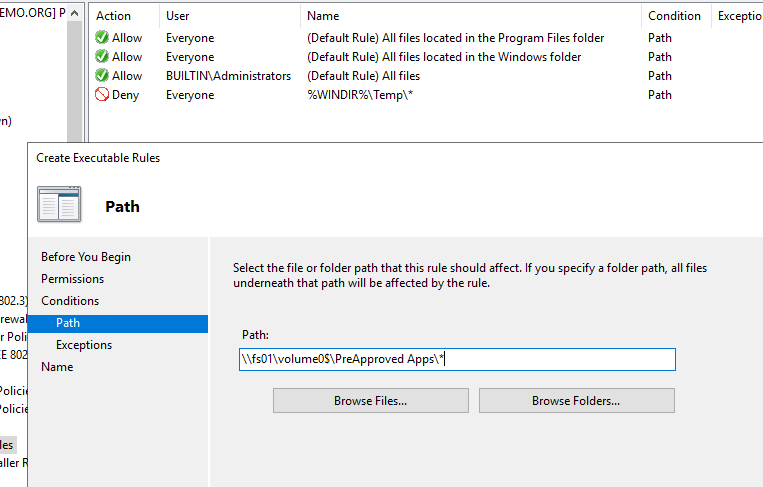
Path Example:
Our end user is able to install 7-Zip because we preapproved the installer. Try it. However, if you previously deleted the Program Files folder Applocker Allow entry, the installed app needs to be approved as we can now see remotely from the Applocker Logs:

The Details tab shows us that this app is not signed. It’s open-source freeware from Russia. I use it, but you decide for yourself.
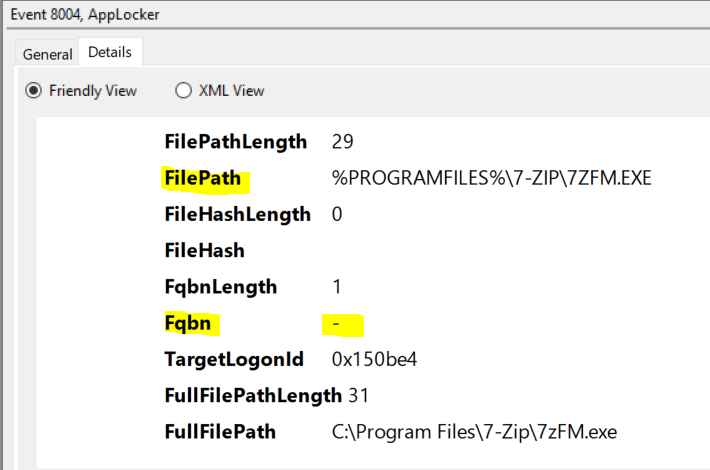
In this case, we’ll do a Path Rule. Copy the path from the Event Viewer:
%PROGRAMFILES%\7-ZIP\7ZFM.EXE
This particular software package has more than one executable, so a wildcard will be needed, or you’ll have to individually approve each exe file. Here is the path with wildcard:
%PROGRAMFILES%\7-ZIP\*

Note the asterisk (wildcard) in place of the exe name:
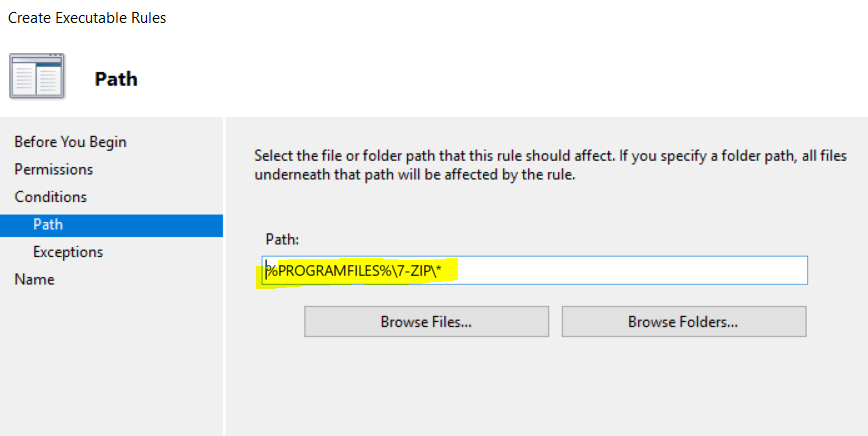
Click Create and you should have this:

Reboot your client to test. Your client can also just run GPUpdate /force from a command prompt to refresh policies. As you can see, 7-Zip File Manager now works:

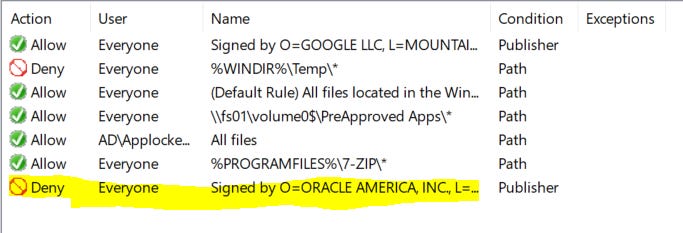
Another thing that I recommend is blocking software that can lead you to trouble due to licensing. Some users will think nothing of installing stuff that comes from companies with large fees and huge legal departments. Block it here and it won’t matter if it was on a USB drive, a download, or already on their machine. It will not run now.


Move the slider up to Publisher. Now anything from that publisher is blocked.
Resulting list now looks like this:
and for the end user:
Tip:
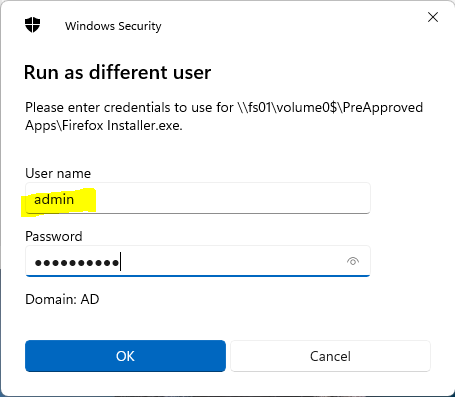
To force install an app that isn’t approved (or pre-approved), Right-click on the installer and choose Run as a different user.

Use an account that is in your ‘Applocker Admin’ group.
Tip: Wildcards can be used to allow items in the users appdata folder like this
C:\Users\*\AppData\Local\Softgrid Client\*
The first * means any user. The last means any file in the folder (or subfolders of) ‘Softgrid Client’.
For a small organization, you could probably skip the rest of this walkthrough.
At this point, you may be thinking what a hassle it is to have to connect to each of your workstation’s Event Viewers. There is a better way.
Event Forwarding
Event Forwarding is a method where one machine collects selected events from all the others. The end result is you only need to look at one Event Viewer.
You’ll want to pick a server for this role. I typically avoid adding stuff to Domain Controllers, but if that’s all you have, it can go there. My first choice is a dedicated server VM with minimal specs. My second choice is File Server. For this walkthrough, I’ll choose a File Server.
There are two things to do. Set up your server to collect events and set up your clients to forward them.
For the server, do the following. Sign in as Domain Administrator.
Open a COMMAND PROMPT (not PS) as Administrator.
Copy paste each of these lines:
WinRM Quickconfig

::The next two are needed for Server 2016 and 2019

netsh http delete urlacl url=http://+:5985/wsman/

netsh http add urlacl url=http://+:5985/wsman/ sddl=D:(A;;GX;;;S-1-5-80-569256582-2953403351-2909559716-1301513147-412116970)(A;;GX;;;S-1-5-80-4059739203-877974739-1245631912-527174227-2996563517)
Note: The netsh commands fix a permission issue that shipped with Sever 2016 and 2019. It’s possible that your installation doesn’t need them. I needed them on Server 2019.
Here is what it looks like:

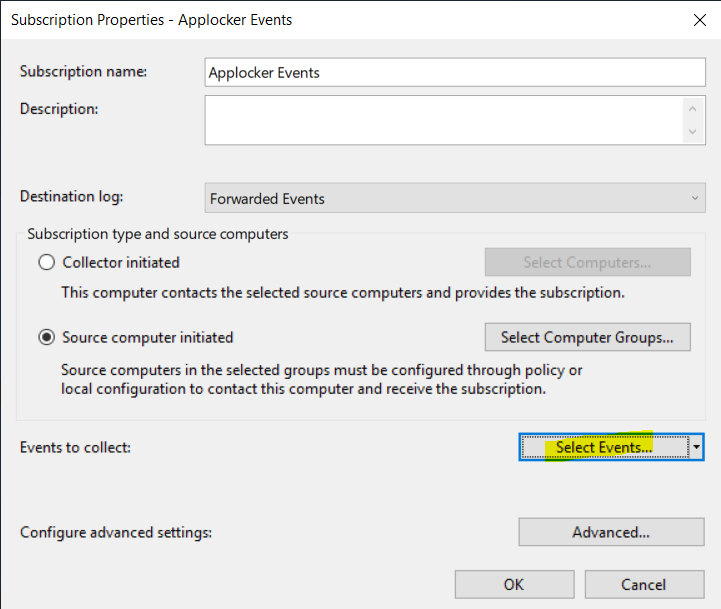
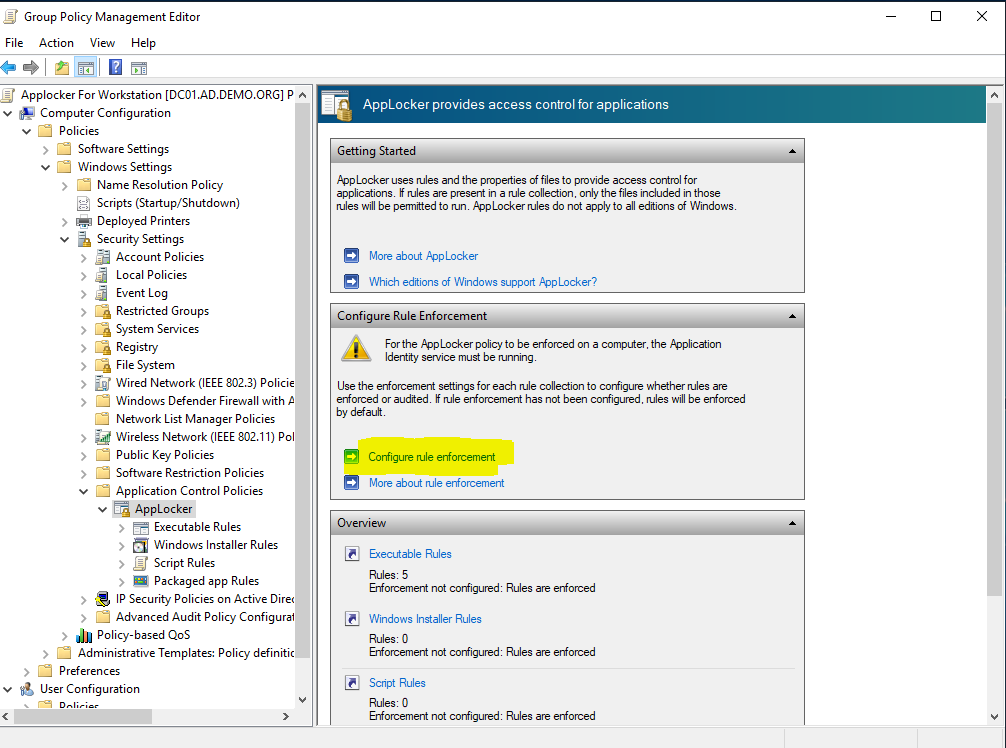
Open the Event Viewer on the server. Click Subscriptions, then Create Subscription:
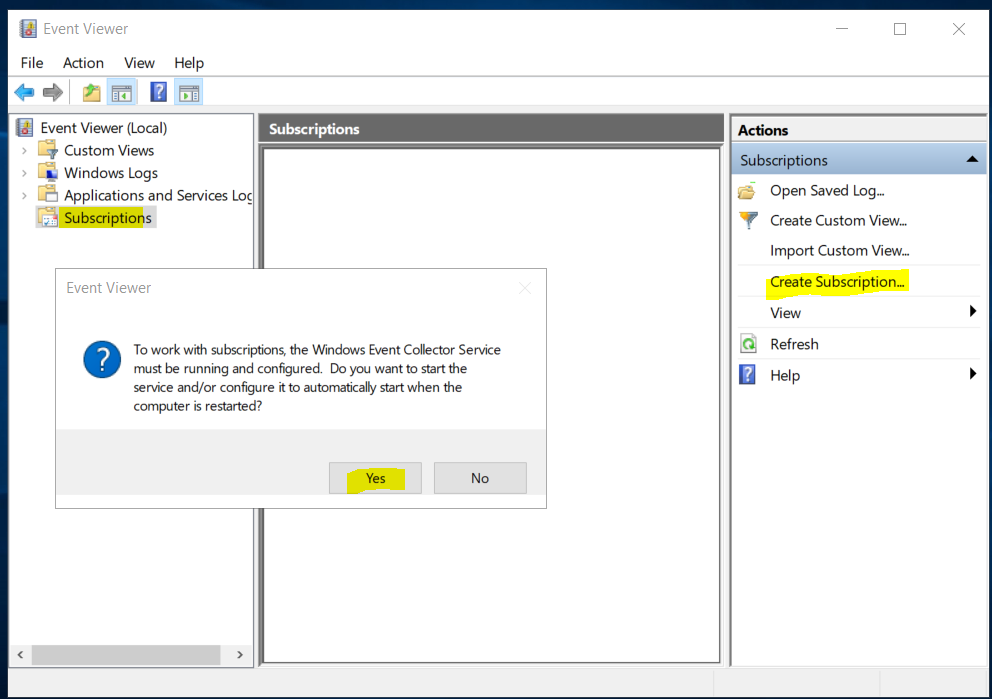


After clicking OK you’ll get to this:
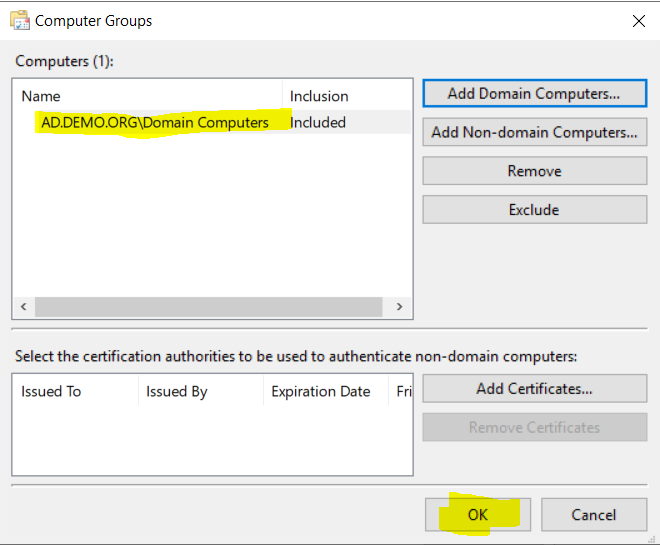
Click OK again. Then click Select Events:
Choose these:
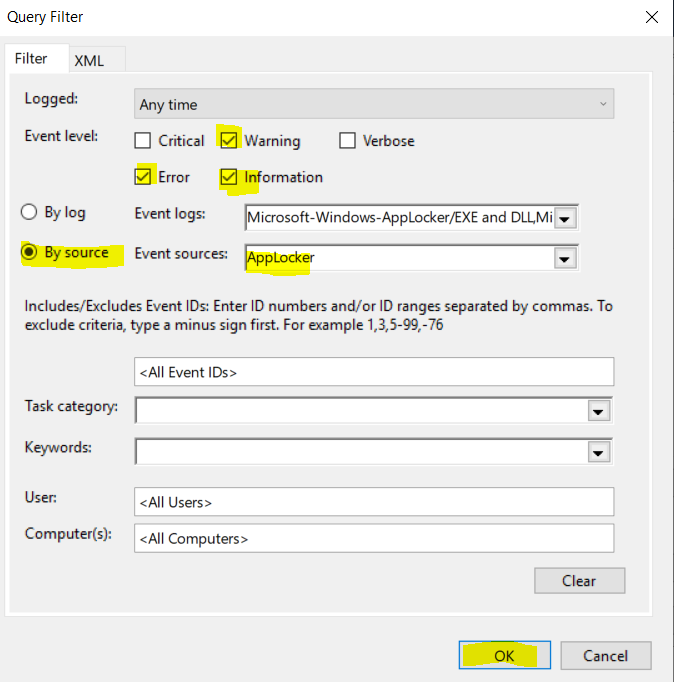
Choose OK.

Result:

Now you move on to your clients. Your clients will be configured by GPO. Create a new policy in the OU where your clients live.
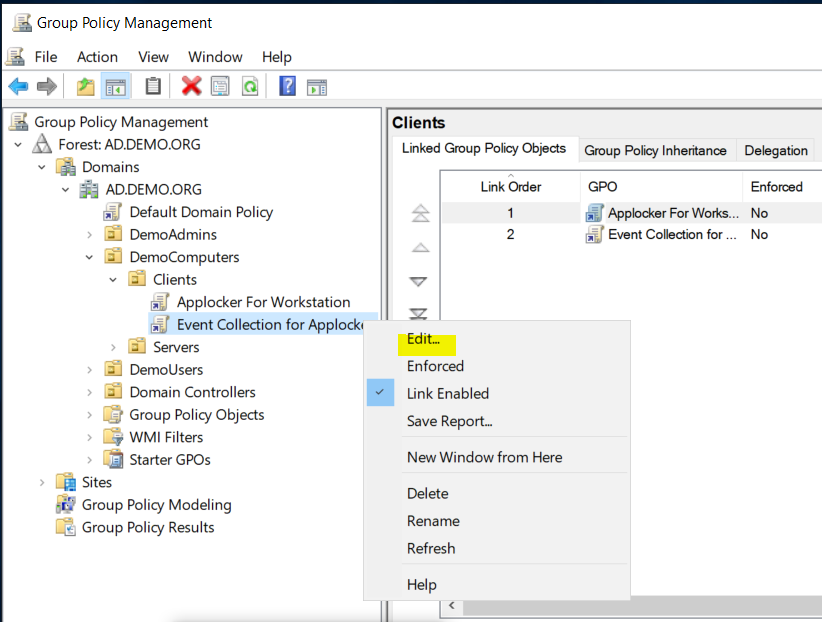
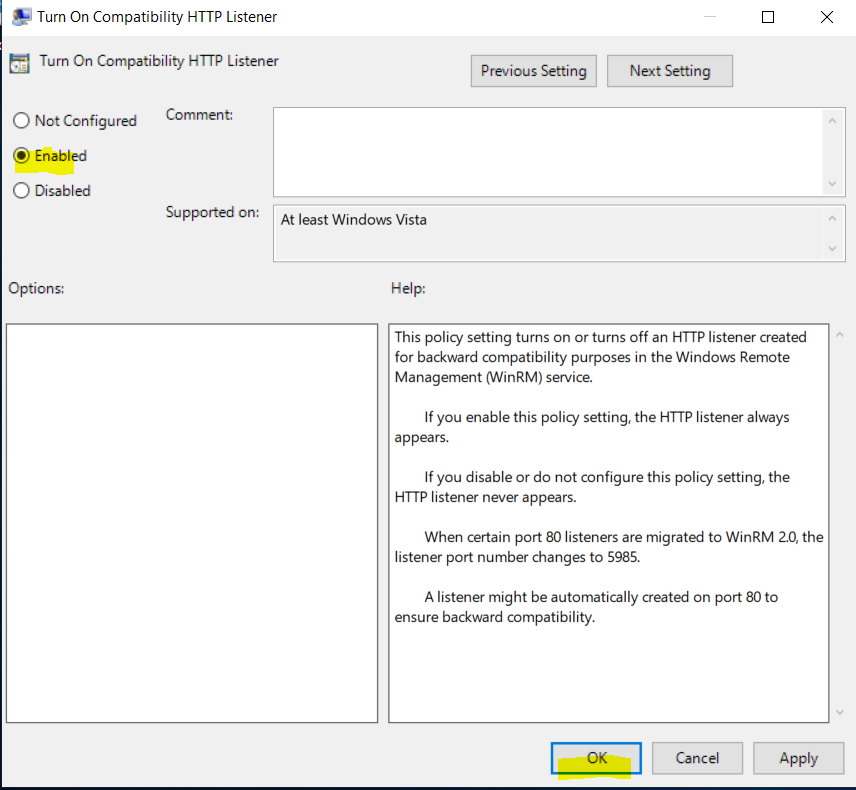
In your policy, WinRM must be enabled.
To enable the WinRM server, go to the group policy Management Editor in Active directory. Under “Computer Configuration/Policies/Administrative Templates/Windows Components/Windows Remote Management/WinRM Service/ Turn on Compatibility HTTP Listener” select Enabled.

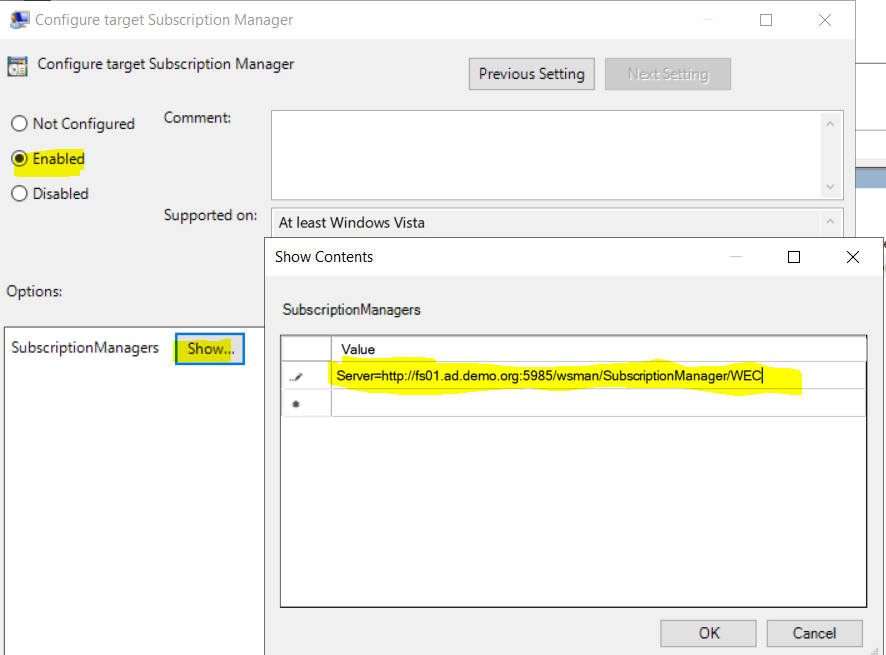
Secondly, to configure the WEF subscription server, go to “Computer Configuration/Policies/Administrative Templates/Windows Components/Event Forwarding/Configure Target Subscription Manager”.

Tick Enabled and click Show.
Enter your fully qualified server name as follows Server=<collector fqdn>
Mine is this entire line:
Server=http://fs01.ad.demo.org:5985/wsman/SubscriptionManager/WEC
Replace the part in italics (fs01.ad.demo.org) with your server and domain info.
Finally, turn on WinRM Service and set to Automatic as shown:

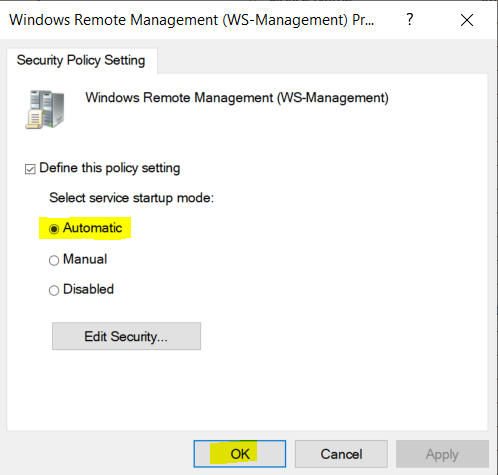
Click Ok to finish the entry. The GPO is completed.
Reboot a client (or GPUpdate).
Check your Subscriptions Runtime Status. Client computers should start showing up.

On the server where you set up Subscriptions, add yourself (or group) to the Event Log Readers group.

On the server where you have Subscriptions, configure the firewall to allow ‘COM+ Network Access’ and all ‘Remote Event Log Management’ rules.

Now you can remotely access the Event Viewer logs on the server, and see all of your clients Applocker events in one place. Just open Event Viewer on your machine, choose Connect to another computer, and enter your server name.

Once connected, you are interested in the Forwarded Events log.
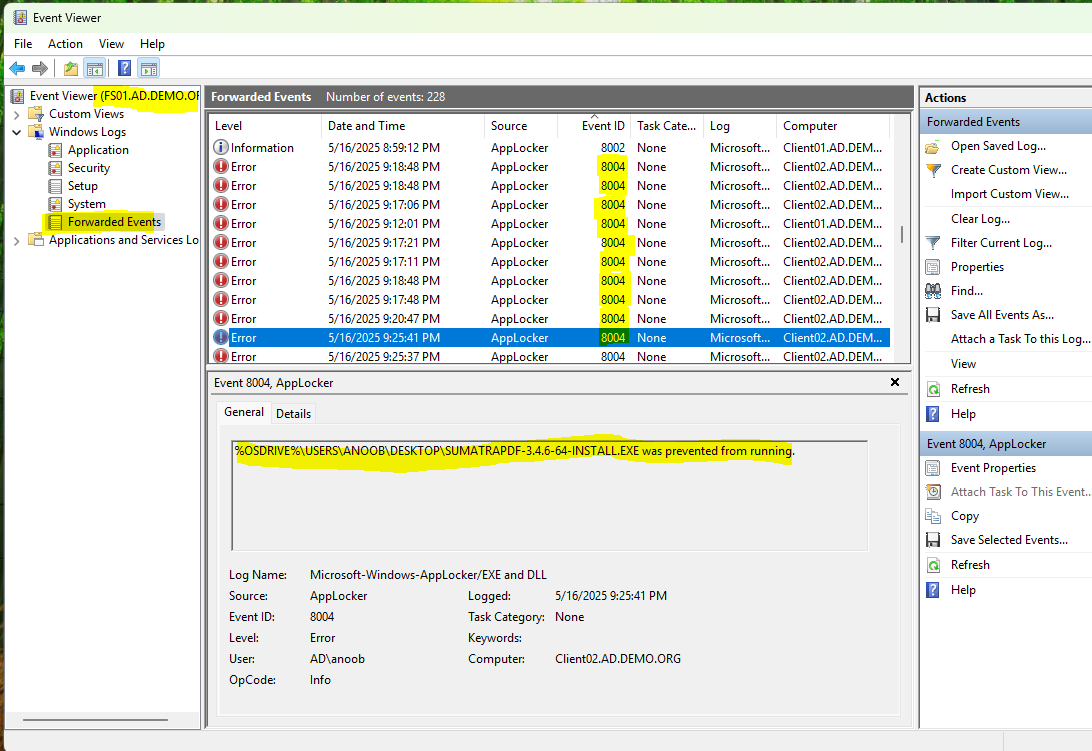
8004 is the event that tells you an exe was blocked.
At this point, you are going to need to monitor the Event Viewer for Event 8004 and approve apps as needed. Be sure to pay attention to your user’s issues and remind them of Applocker.
Note that Forwarded Events take a few minutes to show up!
Larger Organizations
Audit Mode
In Audit Mode, all of the preceding still applies, except for enforcement. Audit Mode is selected as shown:

In Audit Mode, nothing is blocked. Instead, ‘Event 8003’ is generated in the logs for any file that would have been blocked if the rules were fully enforced. Your users will not see any popups, or be disrupted in any way.
If your organization has:
More than a handful of systems.
You have a lot of applications.
Your users or management are intolerant of any disruptions.
Audit Mode is where you need to start. In Audit Mode, you monitor the logs for a period of time, looking for event 4003. When you see 4003, you decide whether that app should be allowed and act on it. Over time, as you approve apps, you’ll see less and less 4003 events. At some point, you will be able to switch to Enforce Rules, with minimal drama, as shown:
For an extensive Audit period, the default log size is probably too small. You can increase it here:
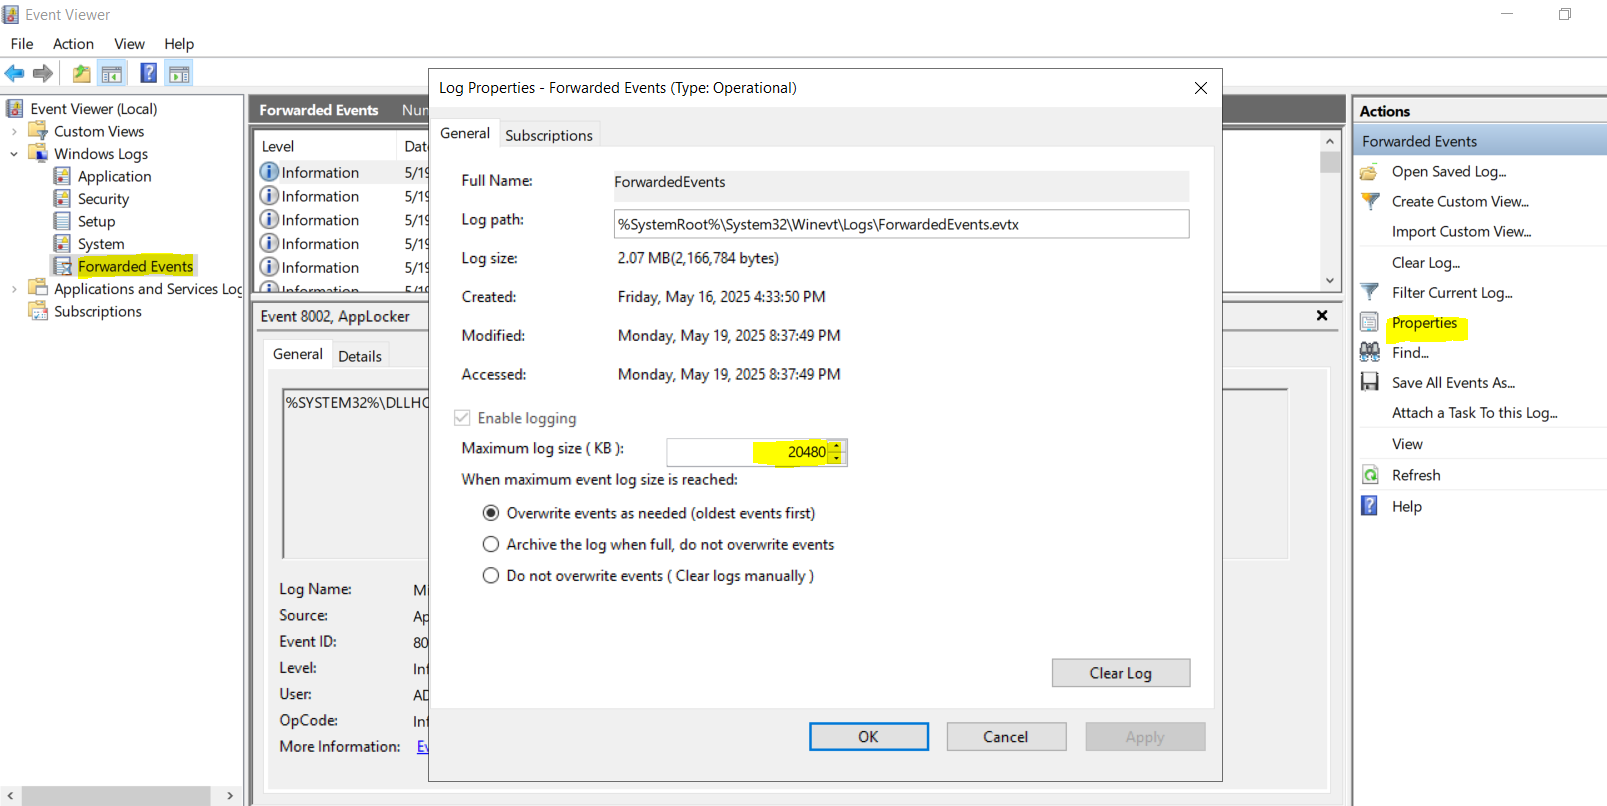
That wraps up Audit Mode
Tips
For Publisher Rules, you can easily create a rule just based on the data in the log. This negates the need to navigate to the actual file. It also negates the need for the end user machine to be on!
Example from the log Details Tab:
Here you have fqbn data. That is the Digital Signing info you need.
O=VMWARE, INC., L=PALO ALTO, S=CALIFORNIA, C=US\VMWARE TOOLS\VMTOOLSD.EXE,12.4.0.48309Of that info, all you need is the Publisher portion. Everything from, and including, O= to just before the first backslash :
O=VMWARE, INC., L=PALO ALTO, S=CALIFORNIA, C=USHere is the trick. Begin a new Publisher rule. Browse to ANY easily available signed executable. Do this:

The result:
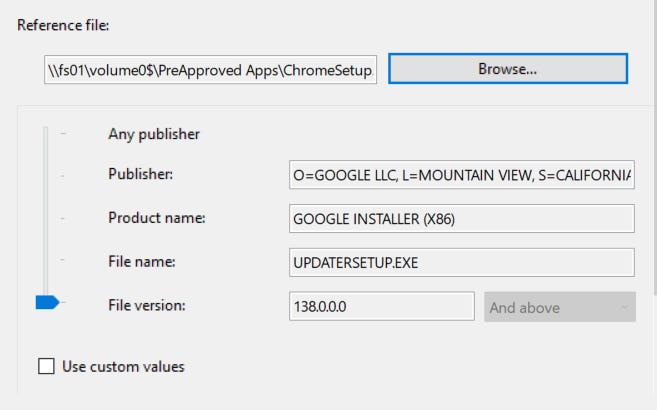
Now check the box ‘Use custom values’. Replace the Publisher field with the new information. Put asterisks in all the other fields.

Click Create. Here is the result:
Another way to get log detail information for the tip above is PowerShell.
On the server where the forwarded events are, open PowerShell and paste this for blocked apps
Get-AppLockerFileInformation -EventLog -LogPath ForwardedEvents -EventType Denied -Statistics or this for audited apps
Get-AppLockerFileInformation -EventLog -LogPath ForwardedEvents -EventType Audited -StatisticsHere is the result:

The above method of data gathering is great for when you need to do a bunch of rules quickly.
Feel free to message me here if you need help!